Categories
Uncategorized NIS norwalk island sharpie Boat Building

Playing with the pointy end.

The Sheerline.

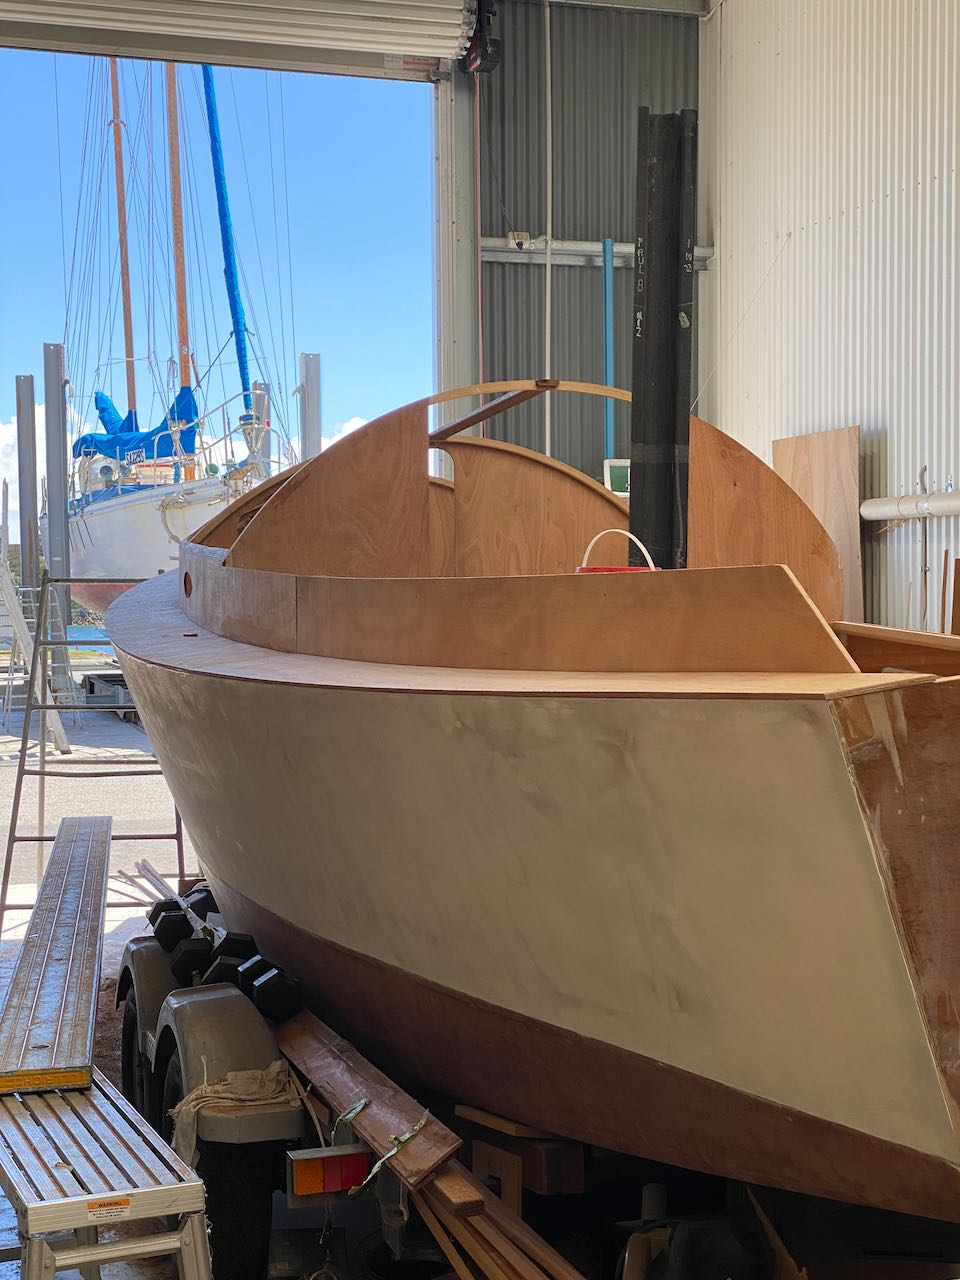
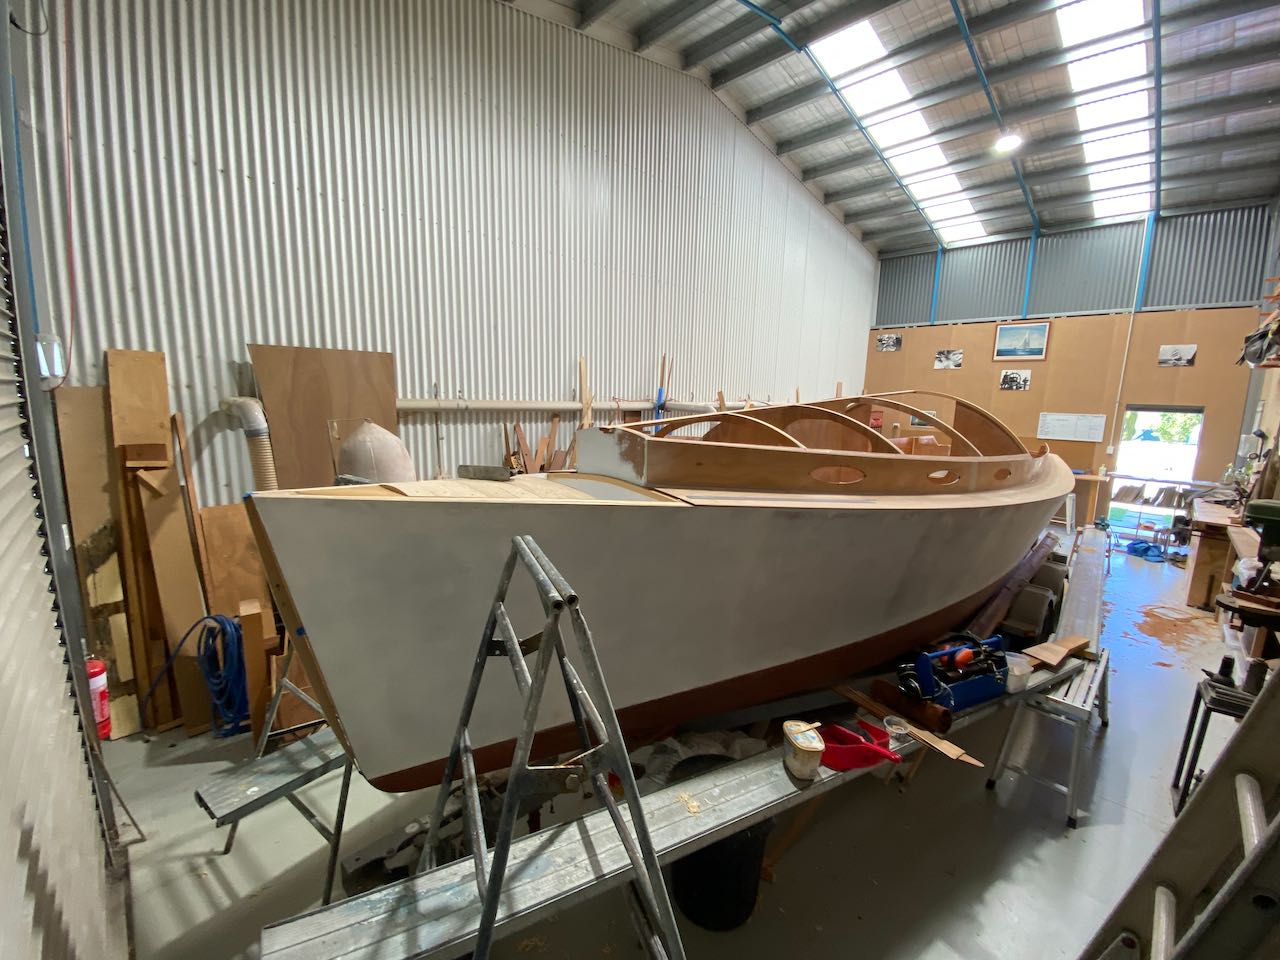
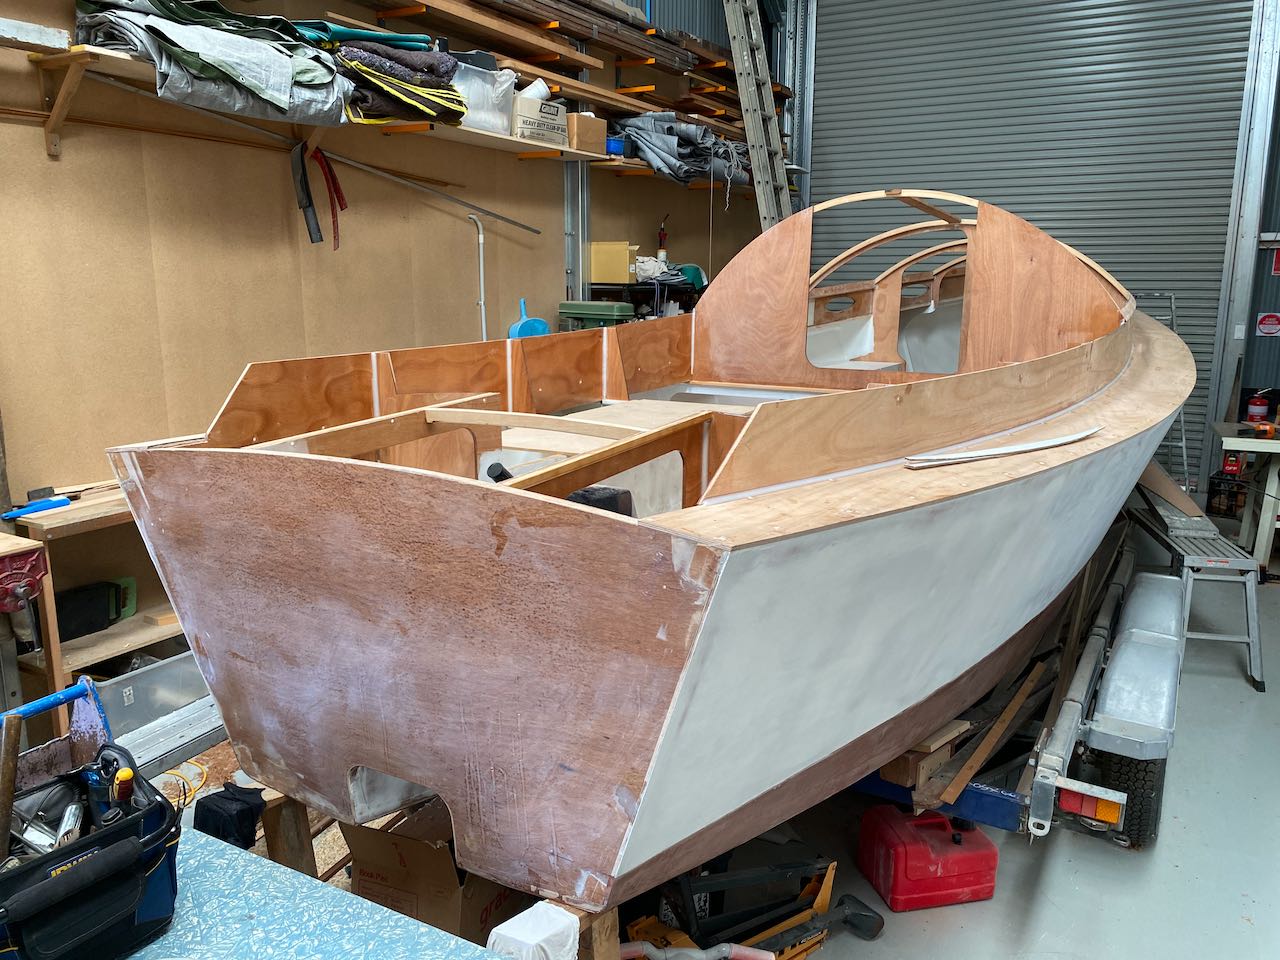
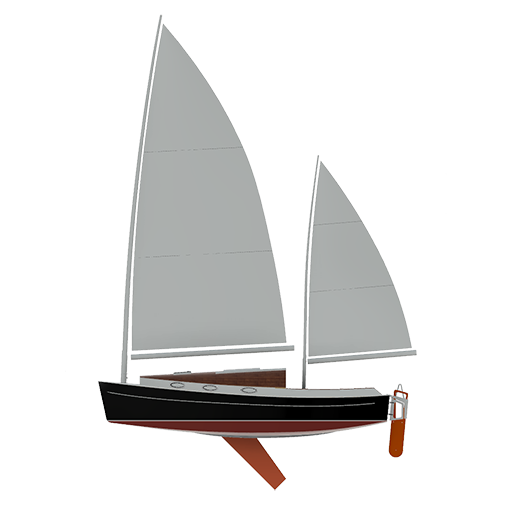
I have to confess the one aspect of the Norwalk Islands Sharpie that I struggle with is it’s sheer as it approaches the bow. It can appear to reverse the curve, or at least flatten out. This bothers me as I really dislike reversed sheers, and I adore simple, strong, and perky curves.

What is the sheer? It is the line on the edge of the boat, that when seen from the side of the boat, goes from the back to the front. It typically arcs from lower at the stern (back), to higher at the bow (front). It’s a practical idea, as a boat moves forward, it has to break through the water and waves, and a higher bow will protect the boat from taking on water.

It has to be considered that a sheer is rarely seen from just beam on (from the side), we see a finished boat from many directions as it moves past us. In the case of a sailing boat, we see it heeled (leaning) from both the windward (sheer up high) and leeward sides (sheer down by or in the water).

Whilly Boat sheer is simple and strong, yet in this position it really flattens off at the bow.
In this position it is a smooth continuous curve.

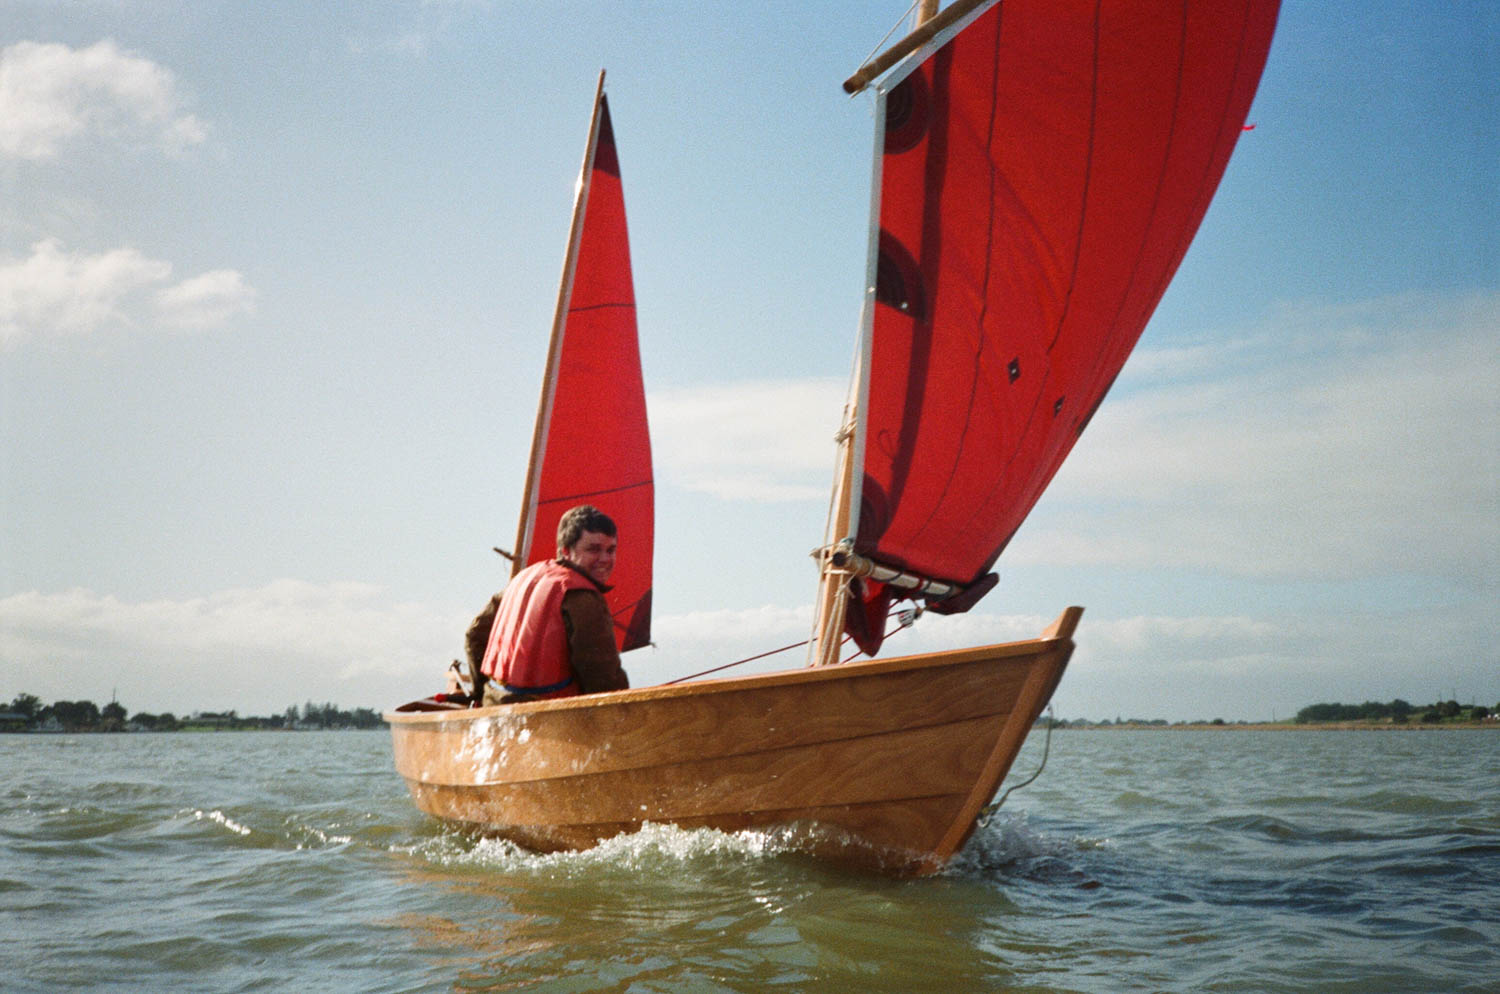
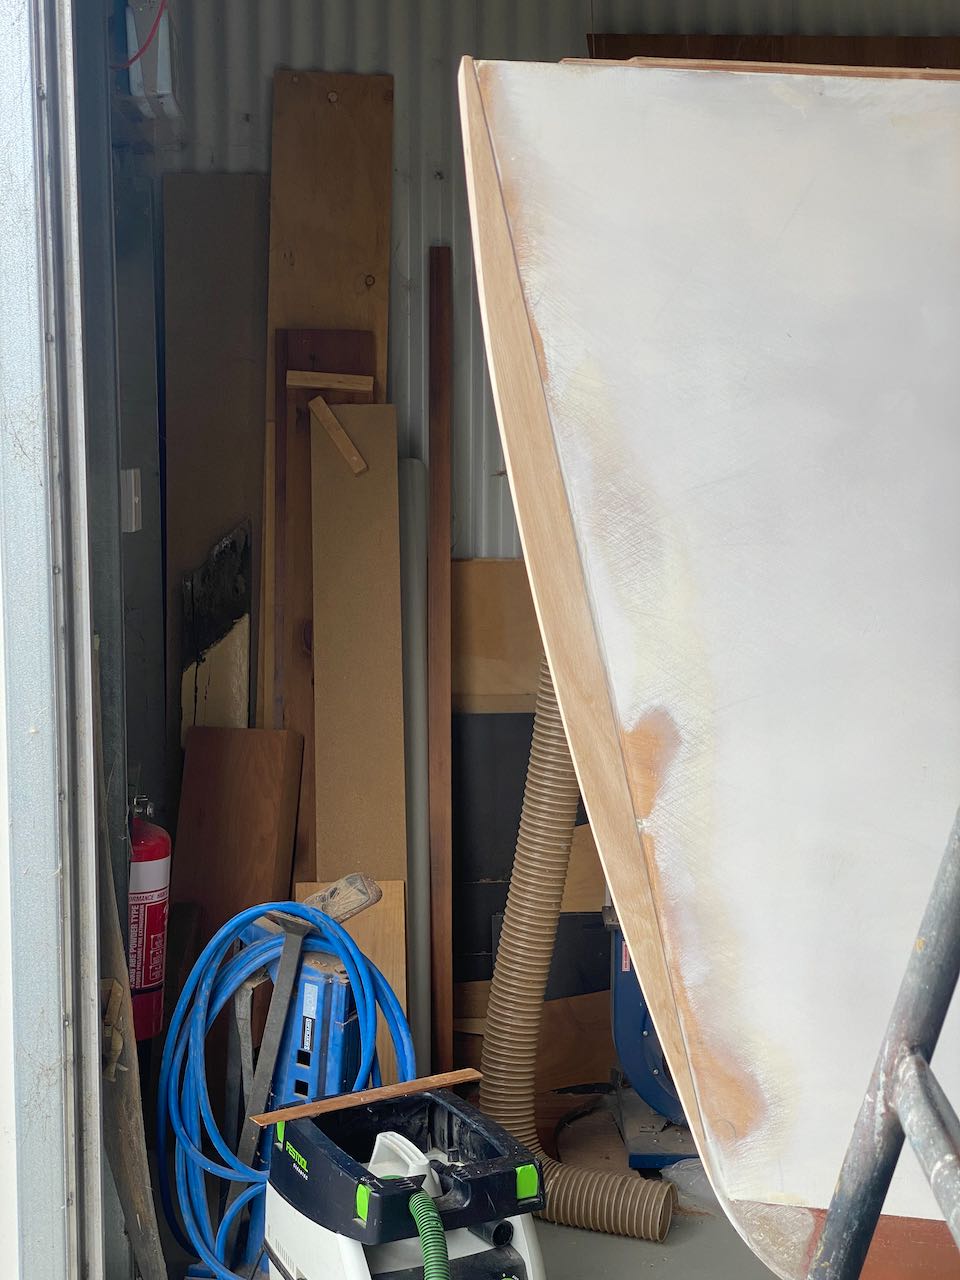
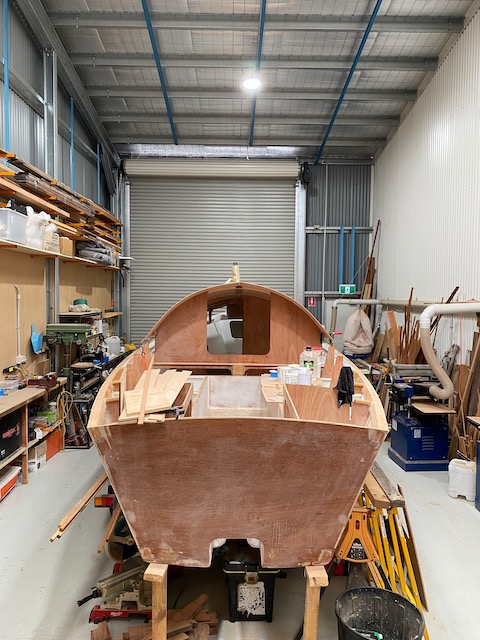
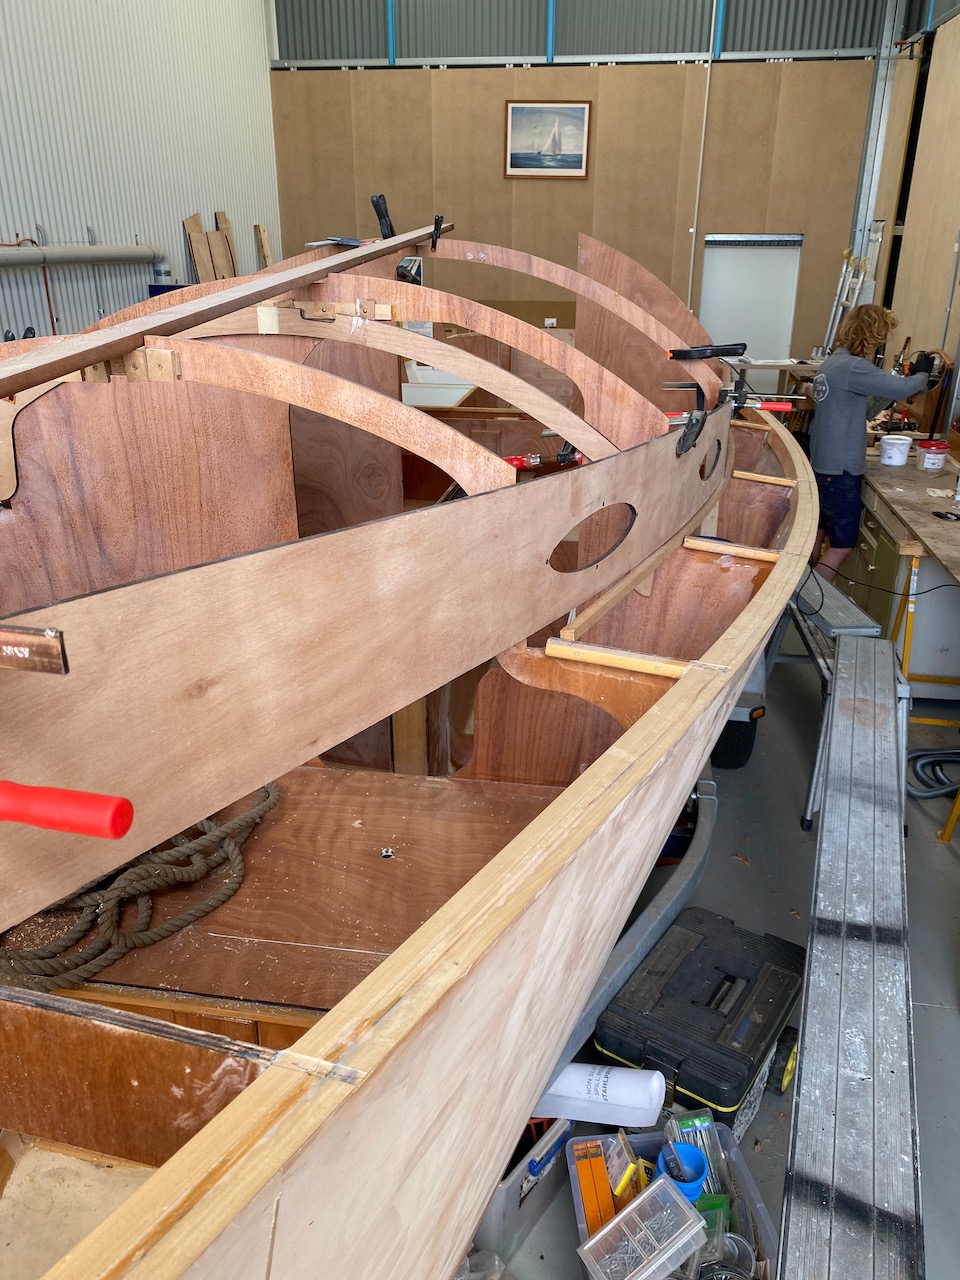
Since the outset, I’ve keenly wanted to have a perky sheer, even turning my nose up at some NIS builds with what I claim as reversing sheers. Well now the rubber is meeting the road, and as far as Troy and I can tell, we’re close to the plans. I can see this flattening and I have discovered what happens sheer of an NIS thanks to some long chat’s with Troy and careful observation…

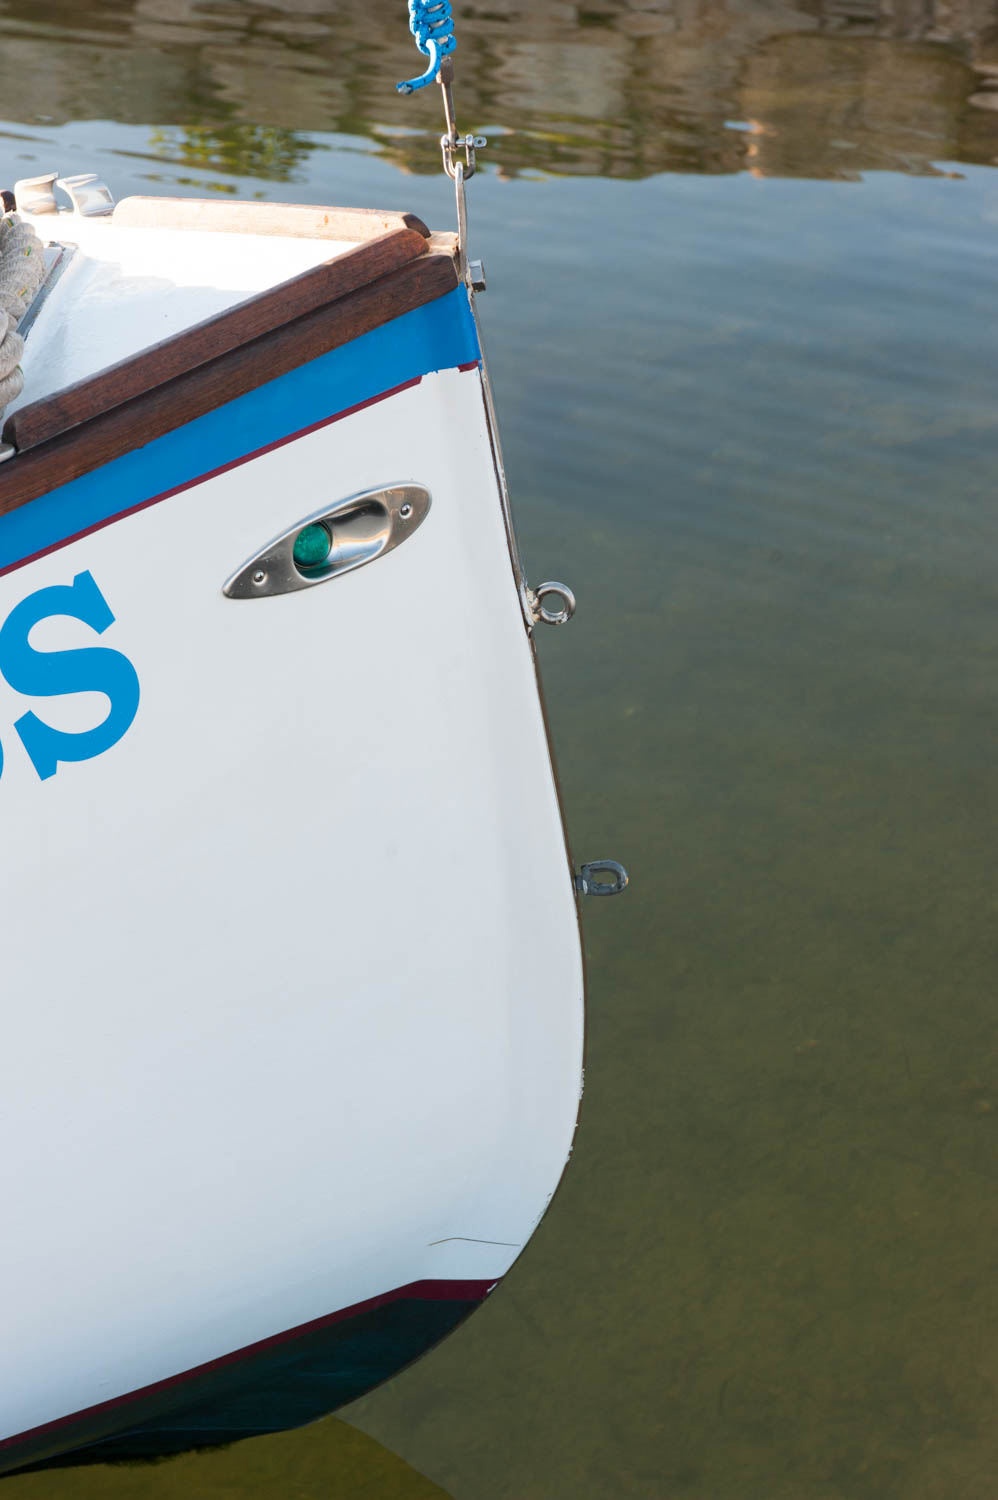
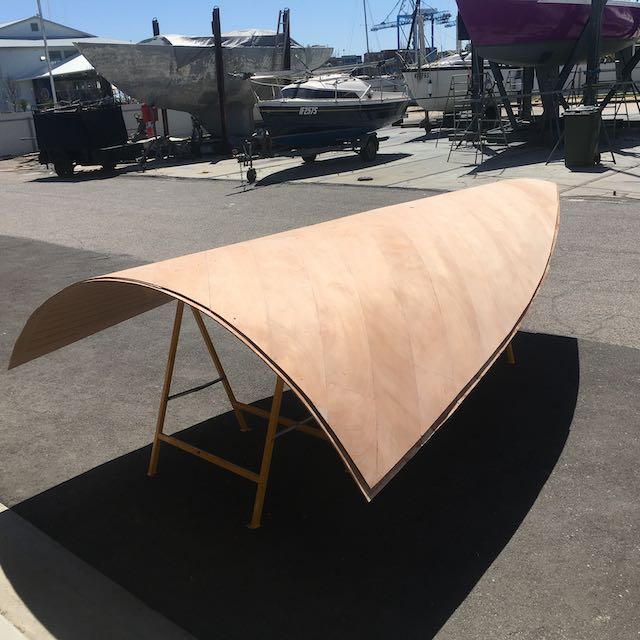
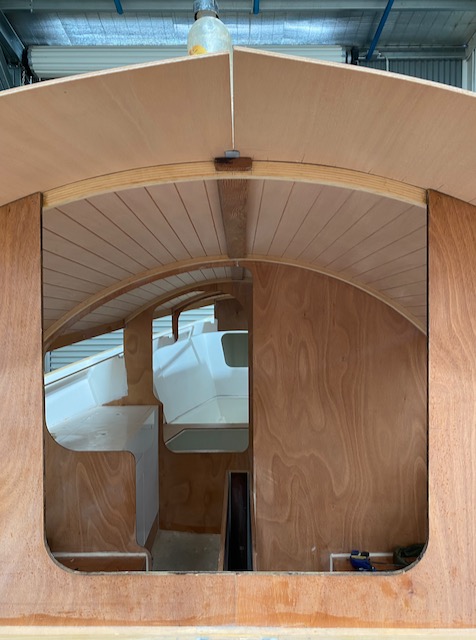
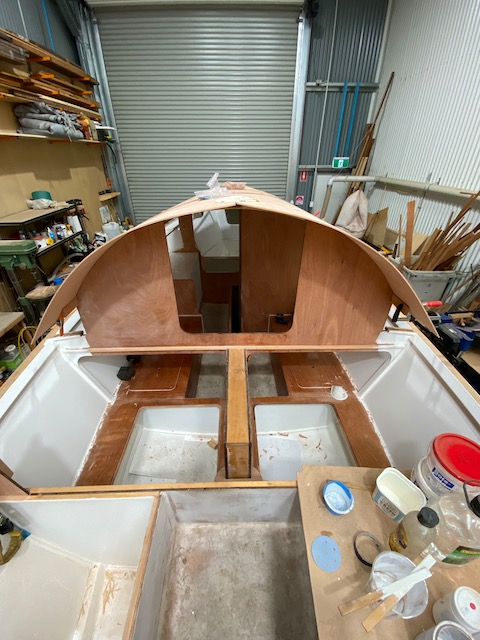
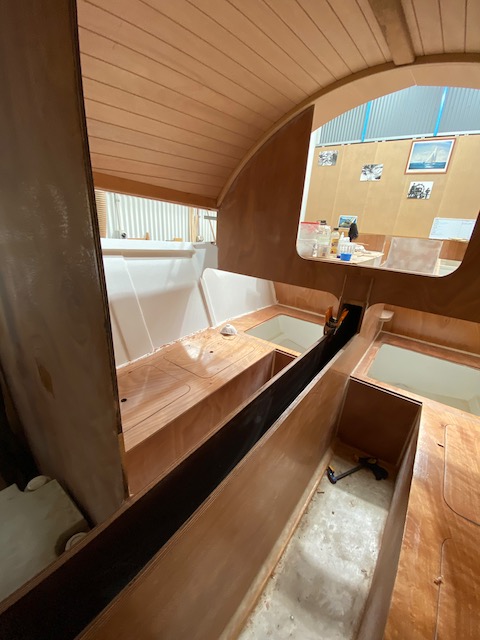
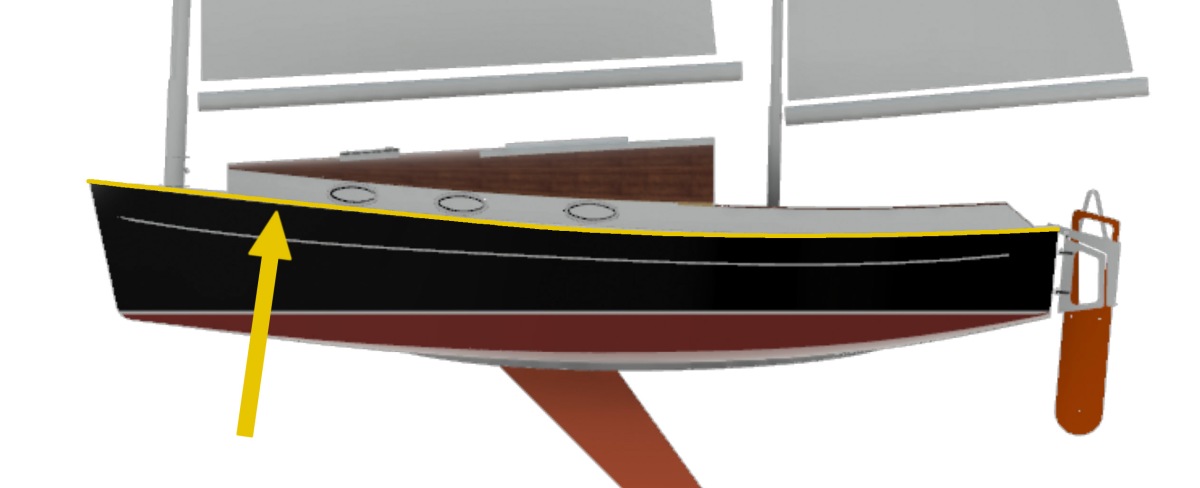
The sheer climbs strongly from amidships but as it reaches the foredeck, it is less aggressive, but it is still climbing. What softens the sheer is the camber on the foredeck, an effect that is not easily seen. At the front of the cabin the side decking takes on a curve that as it progresses forward, creates a crowned foredeck, which is ideal for shedding water off the boat not just down the side decks aft.

So this crowned foredeck, when seen from the side, gets mixed in with the sheer line, flattening it, and the effect is further exaggerated when the boat is heeling (leaning over).

What to do about it…I plan to create a contrasting a sheer line with dark timber or paint, and design some fairleads (guides for ropes that pass over the bow), that follow the sheer line and rise up further exaggerating the sheer. This should all help keep eyes on what I want to be the sweetest of lines.

Or, I could be nuts.

Categories
Boat Building NIS norwalk island sharpie Shedcam Uncategorized wood work

Stem decisions

With an NIS, there are many details that are left to the owner-builder to decide. It was one of Bruce Kirby’s principals with this range. He didn’t want to be too prescriptive. Sharpies can be seen as a tight fitting boat, and such a thing is best ‘custom fitted’.

This can be frustrating and induce procrastination, but if you tackle it with whatever confidence you can muster, you will be rewarded with something unique.

In this instance, the outer stem needed sorting. I set the stem face way back when I laminated up the inner-stem and rebated the sides into it (https://wordpress.com/post/paulsboat.wordpress.com/241), and it ended as a flat face.

I’ve lived with this flatness for many years and it has grown on me as a stoic workboat detail, but it has always needed an outer stem to cap it off and provide additional protection.

If you review any of the modern renderings, the sharpie stem appears to be quite flat, but in looking at what other builders have done, you will see a wide variation of bow shapes.

Troy of Adelaide Timber Boatworks gave me a nudge to make a decision on the outer stem profile. So on one quiet Sunday, I mocked up a profile that came from an idea that has been swimming around in my head from the beginning…the catboat heritage.

Sharpies seem to carry some catboat heritage. While they are long and thin and catboats short and broad, sharpies carry a mast in well forward in the bow, they are cat-ketches. Sharpies were workboats as were catboats, hauling nets over the side, running into shallows, dragging for oysters…

A catboat’s bow has always charmed me. They appear to sit plumb vertical, and almost rake aft. It’s a strong, purposeful look. So I mocked up a curve that fairly left the forefoot and pushed forward and headed vertical as it went up.

Troy encouraged me on this path, and took my mockup and added further energy to the curve, and while it doesn’t rake aft, nor sit vertical, it feels like it may.

I love it.

The almost-finished profile.
Categories
Friends Philosophy Uncategorized Whilly Boat

Farewell Iain Oughtred

Whilst this blog is about Norwalk Islands Sharpies, you will see my love of Iain’s boats threaded throughout. There is no doubt that his designs are foundational to me. Not only did his Whilly Boat draw me into boat building, but every single one of his designs, at some time, has stopped my in my tracks and held me for a time. Iain’s work proves that plywood can be made to dance the most beautiful dances.

I would argue that both Iain and Bruce Kirby approached epoxy plywood boat construction from different but highly effective directions. It is fabulous what they have given us.

A lot has been written about Iain since his passing on February 21st 2024, and I am keen not to repeat others’ words, I’d encourage you to read further at these links:
https://smallboatsmonthly.com/article/iain-oughtred/
https://www.pbo.co.uk/news/iain-oughtred-tribute-84692
https://www.watercraft-magazine.com/iain-oughtred/

I spent a few days around Iain at the 2011 Australian Wooden Boat Festival and found him to be a gentle soul who has but an inkling as to his effect on the world. He was very quiet and carried a wry smile. I had corresponded with him back in 1988 when modifying the sail plan to his Whilly Boat design, he was kind, but I expect I elicited an eye-roll that most designers should save for us ‘modifiers’.

In the Greek style, gods are human-like and raw, and accomplish heroic feats. Iain is one of my gods.

Categories
Boat Building Epoxy Tools Uncategorized wood work

Steps, decks, doublers and more.

Building not writing.

It’s been a good holiday season for me and the boat, powered by a strongly recovering wrist, a desperation to make real progress, and the inspiring industriousness of Troy’s work.

Thankfully, I’ve been able to afford to have Troy and his assistant Luke working on the boat for longer periods. There is something about professionals, and their detachment from a project, that has a momentum I’ve never been able to hold when boatbuilding. It’s a freedom from all the stifling yet wonderful choices many of us have as owner-builders. The agony and the ecstasy.

The forward tabernacle step is painted and installed and fits the part like a glove. I had to purchase a cute little angle-o-meter to set the rake, and wow does this work well.

The mizzen tabernacle step had to be beefed up, I realised this when the main was complete, so I set about adding another layer of 16mm ply to the existing fixed ‘socket’. The mating fit of this to the horseshoe curve of the carbon tabernacle is important so the stress load is well shared. I used Botecote Epox-e-glue to perfect the fit as a moulding paste. I protected the carbon tabernacle with slippery packing tape so it wouldn’t stick in there. It worked a treat.

Next the plug, or key had to be made, this is a removable piece of ply that fits the inside of the carbon, and evenly clamps the tabernacle in place. Again the angle-o-meter was employed to ensure a rake of choice could be made. All this needs now is paint, and so it waits until the can is opened for a larger job.

Meanwhile….

Troy and Luke have powered through a final sheer fairing, which I joyfully weighed in on. There is nothing better than contemplating, discussing and tweaking the sheerline. They then set about joining and laying the side decks and cabin sides. Wow this has changed everything. It’s a BIG marker of progress. They did a great job.

I followed up with a bit of cleanup and epoxy coating of bits of the underside. Troy had pre-coated and pre-painted these, but there were parts needing finishing.

We both missed the critical stern quarter deck doublers (under deck cleat support), and these are complex little shapes, not a square edge in sight. So I set about fashioning these up out of laminated 9mm ply and set them in a mortar of e-glue, oozing everywhere. Access to these is through the wet lockers in the stern, the areas either side of the outboard well. With the central stern decking still off, it didn’t require too much contortion.

Once the deck doublers were cleaned up and sanded, the lockers begged for several coats of clear epoxy as they are likely to get banged about with fuel tanks other easily forgotten smell sources. This now all done, the next step is more paint, off-white Aquacote, brings in the light and is easy on the eye.

To truly test my resolve and stamina, I’ve been tackling sanding and epoxy coating the underside of the cabin top. Thankfully Troy had laminated this and popped it off, upside down on the ground. You may remember that I had the brilliant idea of longitudinal cove grooves to create a handsome effect…well each groove needs sanding and careful brushing, 3 coats of epoxy, 3+ coats of paint.

A true test of the fresh wrists, knees and back.

Categories
Boat Building Epoxy norwalk island sharpie Uncategorized wood work

Progress by Troy.

It’s five months after surgery and the right wrist is beginning to be useful. It is a great feeling.

Thankfully I’ve had the funds and Troy has had the time to see some progress in my down time. He has completed the cabin top, it is fully laminated (one layer of 5mm with groves to simulate panelling, and two diagonal 4mm x 200mm strips. Now its all dry and trimmed, Troy has removed it off the boat to enhance access as we move into the next stages.

Next was nutting out the cabin sides and deck relationship, something that is not overly obvious. Do the sides sit on the deck, or does the deck push up to the sides? Turns out the CnC cut pieces fit best with they sit sitting on the deck. Not wholly traditional, but when ‘glassed up with fillets, it won’t matter.

Troy joined the cabin sides to make single pieces, and his join is exquisite. I had planned a simple butt join, but he has rebated and ‘glassed the joins into invisibility.

Categories
Uncategorized

Talking Sharpies with Robert.

I’ve been wanting to capture my conversations with Robert Ayliffe and share them with the wider boating community. Being a fan of podcasts I considered this medium, but what I really wanted is for all to have the same opportunity to chat with Robert. We should all be at a boatshow all the time.

The back and forth is everything.

So, with the help of Peter Ironmonger who administers the perpetually useful FaceBook group (https://www.facebook.com/groups/223381961340209), we’ve embarked on a series of YouTube presentations, where Robert will present and answer questions of those who join the Zoom call, or even those who propose the questions in writing.

Here is the first session, shared on Robert’s new YouTube channel. You should like and subscribe, and sign up for the next iteration, it will be announced on the FaceBook group.

Categories
Boat Building Epoxy Friends NIS norwalk island sharpie Uncategorized wood work

Wrist and Roof and more.

My after my two times tangle with the surgeon last year, having my left (dominant) wrist fused to stabilise it and manage pain, he promised me my right will need some attention sometime. He was right. It may have deteriorated in sympathy, been a hereditary feature or from overuse as my left was recovering, but late last year it was rattling like a bag of dice.

Regardless, I wasted no time on this one as the success of the left’s procedure has inspired me to get the right sorted.

The other key driver was the sweet smell of a finished boat… Not to say I am close, but I feel I can reach for it. Especially with two strong, pain free wrists.

Not since I spread out the plans have I felt so close to having a boat.

Looking at the below photos, you may not feel as I do, but having the Troy factor on side changes the odds .


Troy and I decided to embellish the coach roof headliner with longitudinal grooves. It’s a look I’ve always admired. I realise that we are imitating tongue-and-groove paneling and I don’t want a ‘twee’ look, but it creates a pleasant, embracing traditional feel.

Troy developed the technique, but apart from using actual timber strips, had no idea how to execute. He used a router on 5mm ply and it turned out a treat.

This first layer of 5mm will be added to with two layers of 4mm x 200mm diagonal ply strips laminated on top. The shell can then be popped off for finishing, and reattached when the decks and cabin sides are ready.


I’ve been chewing over the door to the head. It began when Troy suggested the head was a bit large for the size of boat. That got me thinking as I’m very receptive to opinions from those I respect. Four counter arguments sit with me on this:

  • I have two daughters and a wife, all fans of comfort.
  • I am not getting younger and a comfortable loo is a thing.
  • There is the potential to have a shower in the head.
  • Bruce designed it that way.

Troy understood these points, but he is worried about movement around the galley. Specifically, the end of the centreboard case is a perfect perch for the chef. Also when nosing through the galley, your bum juts into the head area.

The solution I am working on is a bi-fold door that can leave most of that head area open, and in combination with a cased-in ‘porta potty’ should make the space more usable.

In the background you’ll see the designed, pre-cut bulkhead for the head. The foreground is my mockup.
Note how the proposed door’s top is low to fold against the lower, arched, outboard cabin top, and the centreboard case top ‘perch’ will be left clear.
It’s tight, but it seems to work. I’ll make a 3mm MDF mockup next.

What do I mean when I write “cased-in porta potty”? I am contemplating a box that contains the porta potty toilet that can be closed over it, keeping it out of sight, and possibly venting it to the outside. This will allow for the head door to remain mostly open without the loo featuring in the view and possibly allowing the scent to escape the ‘tent’. More on this as I think it through.

Categories
Boat Building Epoxy Fibreglass Friends NIS norwalk island sharpie Uncategorized

Serious Solid Steps

Those of you with children older than 5, do you remember those first off-to-school days? Do you remember how you felt letting them go? They are still your children, but someone else is now messing with them.

Worry. This is my default position. I worried about both of my daughters and their disembarkation from the mother ship. They are now 18 and 19, and while that gangplank is verrrry long, that same worry is still there. Or at least has been replaced by some other tantalising concern .

This is how it has been over this year as my beloved Sharpie has been in the hands of Troy Lawrence of Adelaide Timber Boatworks.

Troy kindly stored my Sharpie until he and his crew could get clear of their work on the South Australian training vessel One and All. This meant I had storage for much of the first part of the year, and a promise of progress to come.

Troy and his team jumped into puzzling out the motor well. It is a puzzle because each motor has slightly different dimensions and the available space is limited. It must be neat, out of the way and function well.

Cutting that hole in your own hull is anxiety inducing. I am sure it has stolen good progress and sleep! But in the hands of another, and that other is a professional with a can-do attitude, it just happened.

It reminded me of a time building my Whilly Boat when I needed to cut the centreboard slot in the keelson. I must have stared at it for weeks. Then one day, another builder in the shared space who was sick of my faffing, grabbed a 12″ circular saw, mounted the up-turned hull and plunge-cut the slot in minutes. I was swept away with his daring-do.

I learned nothing, I still measure fifty three times before cutting.

So yet again, a hole is cut for me. And following on from this bravery, the motor mount is perfectly angled and epoxied in, the cheeks either side of the slot are heavily glassed, the fuel tank lockers are sized and set up and the cockpit sole is in…wow.

Troy is working to what I can afford, so the progress is not blitzkrieg, but is solid progress. I go down most Fridays and the odd Saturday to potter on the internals, making my own kind of headway, more like Slocum trying to get through the Strait of Magellan.


Update: I should have mentioned my wrist situation (as a bit of an excuse): things are improving, the stamina is limited, but recovery pain from use is mostly fading overnight without the need for painkillers. 🙂

Categories
Personal Uncategorized

Farewell Dad

In July this year I went up to Cairns to be with my mum as my father died.

That is a big sentence. That was a big experience.

Dad and I had worked together for my entire life (I was on the payroll at 12), sharing the ups and downs of owner-operator business. We had maintained a family relationship as best as possible, though that’s often the victim in these ventures. I certainly loved and looked up to him my entire life. So it was a big thing.

Leukemia and the inevitable infections that come with no immune system, were the culprits. He had three years with the disease, but I suspect it was present in one form or another many years leading up to the diagnosis, when he seemed overly tired from everything. It was a hard watching him grind to a halt for what felt like ten or more years.

Dad loved boats, he had built a Hartley Pacemaker when he was 16 (and sold it when marrying mum to build our first home), we also had a runabout in my teens, a 16′ Savage Vampire, which we shared such joy in throwing around. I picked up sailing around that time, something dad never connected with. But he supported every boat I loved. He understood.

We made a few trips up river in my 24’ David Payne gaff cutter, motoring and camping. He wasn’t in his natural habitat in a tent, but he always joined in the fun.

I feel he was owed more time on the water. He did hit the cruise ship circuit with mum, but he was such a natural skipper, such a talented boat handler, he deserved more than a berth with a balcony.

It breaks my heart that he didn’t see this of mine boat built, but as Australia’s favourite crook Ned Kelly once said, “Such is life”.


If you want to read more about Dad’s professional and personal life here are some links:

On the business blog.

On an industry publication, the Imaging Insider.

YouTube video of his Memorial Service.

Categories
Boat Building Epoxy NIS Uncategorized wood work

Cockpit lockers

I am avoiding working in the cabin because I still need to trim down the centreboard trunk to accomodate the new narrower chord centreboard, so I moved aft to tackle the cockpit lockers.

The kit’s pre-cut panels slotted in nicely demonstrating both the router robot and I are in harmony. Yay!

Dry fitting of the portside locker

Knowing under the cockpit sole will be inaccessible, and effectively a sealed buoyancy tank, I chose to put an access hatches in from the sides from each of the four lockers so I can inspect under there. I considered how awkward it will be, hanging in the locker upside down and having to worm in an arm, so I attempted to plan for this in the placement of the holes. I considered forearm length, elbow movement and where I’d want to get to. I picked up a four screw-fit hatches from BCF (Boating Camping Fishing) and a set of brass nuts and bolts from The Wood Works.

The cleats will give plenty of surface area for the seat tops and sides and cockpit sole to bond and form a structure that takes some of the most abuse in a boat.

Then it’s in with the cleats and fillets to lock it all up. Next the entire area got a good sanding and several coats of clear epoxy. Under the sole got extra attention with epoxy, it’s like hard toffee in there.

You can really see the structure of the lockers building strength

The lockers themselves will suffer from being dark caves of lost gear, so I chose to paint them heartily with white Aquacote to bring in the light. I am worried about the pounding they will take over time, so I intend to put rubber matting on their soles.

It was a rewarding part of the build because I felt less precious about the visual finish, and called “done” based on it’s feel. They now glow optimistically awaiting their hatching-in and dark future of servitude.

Cockpit Lockers ready for their tops
Starboard lockers
Under the sole

As an aside, the situation with my damaged wrist four years ago has not improved. It’s not that it is horribly worse, but these past four years have meant no more than a few hours work can be done at a time before I have to stop, and a good days work on the boat can mean a week recovering. Finishing out these lockers really highlighted the problem. After standing back and admiring my work, I booked and appointment with the surgeon to get a fusion.