 What a fascinating little product is this Purbond from Botecoat. It is much quicker to work with than traditional epoxy, or even e-glue. Just spritz down the timber with a mist bottle of water, spatula on the Purbond as evenly as you can, spritz the underside of the piece you are joining, clamp it up and watch it fizz.
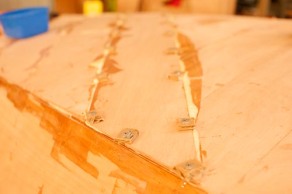
It is bizarre, it foams up to a honeycomb look and It builds up quite a pressure, just using weights was not enough. It lifted my 14kg lead ‘helpers’ I was using to clamp the ply down! And give up trying to clean up the squeeze out, you get most of it, but then you turn your back and it’s oozed some more! By the time it is setting, scraping it off pulls too much out of the joint. Still it sands very easily, and a sharp chisel cuts most of it off. I really like it.
The big benefit is the gap filling. I am sure it is not very structural, you would not want to fill big gaps, but those voids that appear between layers of ply are well filled with Purbond. My sharpie’s first bottom layer was quite un-fair. The 6mm ply strips bend nicely over the bulkheads, but sags between them, so with the aid of some props I have made to push those pieces back up to fair, and the foaming glue, the second layer is much more yaaar.
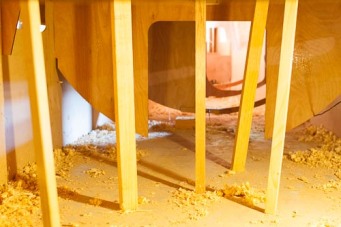
 The props are made out of scraps of timber, with a wing-nutted bold allowing adjustment to it’s ultimate length via a slotted piece of timber. The part I am most proud of is the glued-on piece of sandpaper that allows the wing-nut to lock up the two pieces. I have made four props, and may need more so I can attach more than one plank at a time.