Categories
Boat Building NIS norwalk island sharpie Shedcam Uncategorized wood work

Stem decisions

With an NIS, there are many details that are left to the owner-builder to decide. It was one of Bruce Kirby’s principals with this range. He didn’t want to be too prescriptive. Sharpies can be seen as a tight fitting boat, and such a thing is best ‘custom fitted’.

This can be frustrating and induce procrastination, but if you tackle it with whatever confidence you can muster, you will be rewarded with something unique.

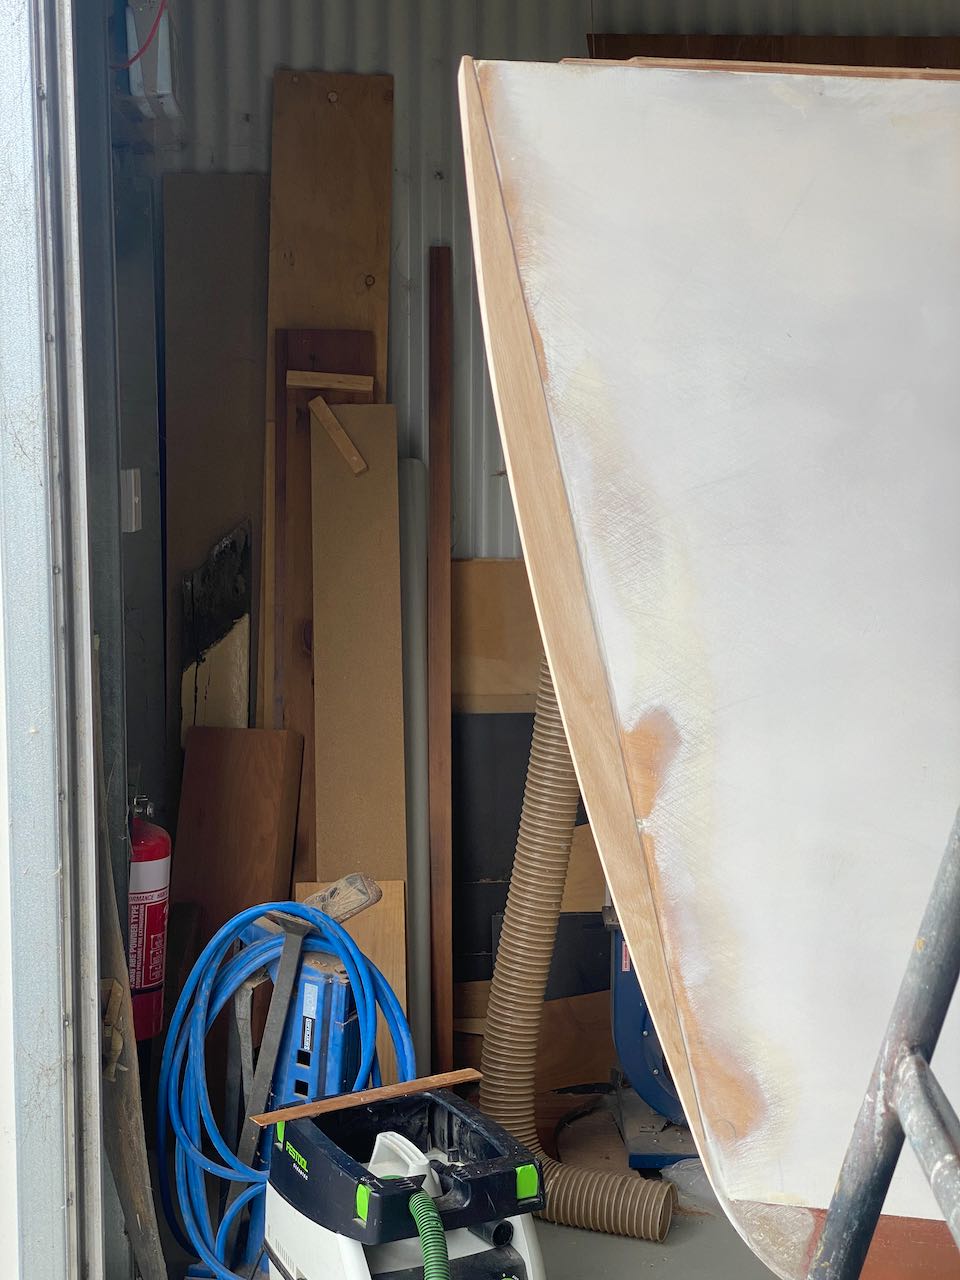
In this instance, the outer stem needed sorting. I set the stem face way back when I laminated up the inner-stem and rebated the sides into it (https://wordpress.com/post/paulsboat.wordpress.com/241), and it ended as a flat face.

I’ve lived with this flatness for many years and it has grown on me as a stoic workboat detail, but it has always needed an outer stem to cap it off and provide additional protection.

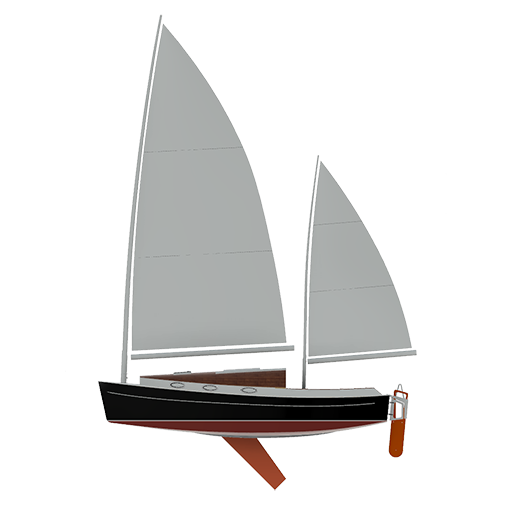
If you review any of the modern renderings, the sharpie stem appears to be quite flat, but in looking at what other builders have done, you will see a wide variation of bow shapes.

Troy of Adelaide Timber Boatworks gave me a nudge to make a decision on the outer stem profile. So on one quiet Sunday, I mocked up a profile that came from an idea that has been swimming around in my head from the beginning…the catboat heritage.

Sharpies seem to carry some catboat heritage. While they are long and thin and catboats short and broad, sharpies carry a mast in well forward in the bow, they are cat-ketches. Sharpies were workboats as were catboats, hauling nets over the side, running into shallows, dragging for oysters…

A catboat’s bow has always charmed me. They appear to sit plumb vertical, and almost rake aft. It’s a strong, purposeful look. So I mocked up a curve that fairly left the forefoot and pushed forward and headed vertical as it went up.

Troy encouraged me on this path, and took my mockup and added further energy to the curve, and while it doesn’t rake aft, nor sit vertical, it feels like it may.

I love it.

The almost-finished profile.
Categories
Epoxy norwalk island sharpie Shedcam Tools Uncategorized wood work wooden boat

On worry.

Or do I mean procrastination? You have read many posts about sanding and fairing, and this is one more, potentially the last (for both our sakes, I hope so).

You put the faring batten on the hull, you look for deviations of more than a few millimeters. You do this in all planes. You argue with yourself what is ‘a few millimeters’. You run your hand around feeling for divets, you mark them as you find them. You fill with epoxy mixed with light-weight filler for sanding, you mistakenly vary the mix slightly from time to time, you save money with some water effected, lumpy filler. You vary the application process attempting to speed things up (troweling ridges vs multiple coats). You sand with varying electric devices, balancing the felt divets with the eyeballed fairing batten results.

Repeat.

Sometimes you over-sand, sometimes you under-thicken the filler. You eventually realise that everyone is correct, this is only a job for hand sanding with a long/torture board. You fight that concept. You plan to hire a fairing team. You can’t find any money for the hire of the team. You wonder where they work and how to find them. You look for more information on fairing. You beat yourself up about not being able to complete this ‘simple’ task that is holding everything up.

You try again on the long board. Your lack of upper body fitness is obvious. The rotten left shoulder bites back. You give up. You beat yourself up and try again. You end up aching and frustrated and the hull appears no better. You ask advice, you get your work inspected, you get varying answers. Everyone is telling you (the truth) that it is a personal decision.

So, you bite the metaphorical bullet, and spend four days hand sanding.

And it now looks and feels pretty good.

It may be fair now!

Categories
Epoxy NIS norwalk island sharpie Shedcam Uncategorized

It’s not fair!

If you have young children you’ll recognise the other meaning of this exclamation. Actually it’s not an exclamation here, I did expect to have to fair this hull, but I didn’t expect to have to do it so soon…

I think I failed when shaping the chine logs, not nearly enough attention to them, plus that first layer of 6mm ply can sag. Thus after the second layer lamination, I saw troughs that need filling before the last layer lands.

uggg
uggg

The process involves using epoxy thickened with ‘micro balloons’, they are fine balls that will sand easily but have a good compression strength (See BoteCote Pacific). You first wet the area with normal epoxy, then trowel the thickened epoxy on with a toothed scraper. I chose one with an 8mm tooth. The mix has to be just right, too dry and it is ‘flaky’ and too wet and the peaks sag. Too hot a day and you have no time to work, too cold and it will sag.

The tools.
The tools.

The toothed pattern left halves the sanding effort.

After you make your boat’s bottom super ‘groovy’, you hit it with a sanding board, aptly called a “torture board”. You get tortured and board all at once. If the board is long enough and you are careful, you will reshape the hull to perfection. The grooves are then roughed with a wire brush and filled in with more of the same thickened epoxy. A final sand brings the magic.

Torture and board
Torture and board

Christmas time in Adelaide can be too hot for this palaver, but luckily the season is just right, so I’ve poured time into this. It has been mindless and very physical but rewarding.

I would like to have been prepping for fibreglassing the hull and perhaps painting, and in my wildest dreams, turning the boat, but life got in the way and I am not unhappy.

Forgive the video, it is a bit long, even though I have edited out most of the scenes where I am mixing epoxy. The mixing is laborious, it takes most of the time, even the sanding goes quicker!

Categories
NIS norwalk island sharpie Shedcam

Purbonding time-lapse.

I am still messing with time-lapse photography, I had intended for the entire build to be recorded, but the failure of the DSLR I had employed has left me high and dry. Leaving a replacement $3k camera bolted to the rafters is something I could not afford and setting up a remote control-able camera time-lapse system was out of my desire range. So I will settle with recording interesting snippets when they occur to me.

The action of this Purbond is fascinating, you will note it foaming during the clamp up, also watch for the bit towards the end when I dive inside the hull and prop up a sagging plank.

Categories
Photography Shedcam

Stop motion video of a side panel going on.

The camera I was using to record the build has become a wobbly old piece of history. It is a Kodak 14n camera, one of the finest early full sensor DSLR cameras. We paid about $15k for it in 2003.

It retired to the top corner of my shed, and is tethered via Firewire to a 2002 Macbook laptop. Each shot had to be in RAW format because the high contrast range in the shed with the door open. The light streaming in the door and dark windowless corners is too great for the in-camera processing of jpegs.

Consequentially I have several hard drives filled with 10 minute interval shots of my shed…

Well the old friend has been suffering a sticky mirror, I had it hanging upside down for a while and this sealed it’s fate, so I went shopping for a new stop motion camera and here are the results from my $300-ish Brinno camera.

Categories
NIS Shedcam

Shedcam test