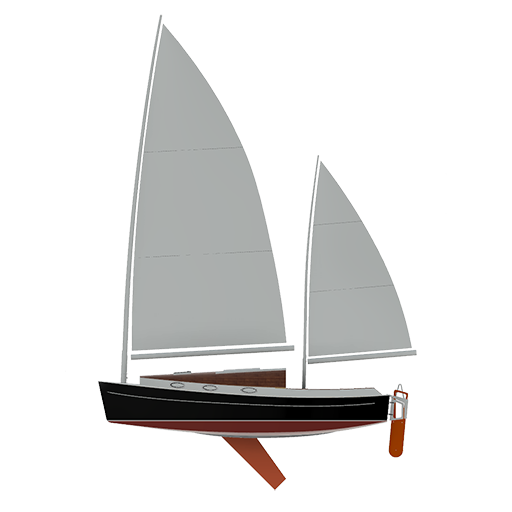
Before my recent surgery I was urged into moving the boat so the business could claim some of my extravagant space back.
I towed the boat with my 1966 SII Landrover, we made such a spectacle I was stopped twice to answer questions.
I was pretty excited as the destination was Adelaide Timber Boatworks. Troy Lawrence, the principal at ATB, is a well known shipwright and has recently leased a shed at the Royal South Australian Yacht Squadron opening up the ability to welcome in such projects as mine.
I knew I had a long recovery from surgery, and I was tired of progress to the boat only happening in my mind, so we’ve scraped together some money and engaged Troy on a project by project basis.
First up, the motor well.
The tight fit we had.More space for work work.Luxurious amount of space at Adelaide Timber Boatworks.
I am avoiding working in the cabin because I still need to trim down the centreboard trunk to accomodate the new narrower chord centreboard, so I moved aft to tackle the cockpit lockers.
The kit’s pre-cut panels slotted in nicely demonstrating both the router robot and I are in harmony. Yay!
Dry fitting of the portside locker
Knowing under the cockpit sole will be inaccessible, and effectively a sealed buoyancy tank, I chose to put an access hatches in from the sides from each of the four lockers so I can inspect under there. I considered how awkward it will be, hanging in the locker upside down and having to worm in an arm, so I attempted to plan for this in the placement of the holes. I considered forearm length, elbow movement and where I’d want to get to. I picked up a four screw-fit hatches from BCF (Boating Camping Fishing) and a set of brass nuts and bolts from The Wood Works.
The cleats will give plenty of surface area for the seat tops and sides and cockpit sole to bond and form a structure that takes some of the most abuse in a boat.
Then it’s in with the cleats and fillets to lock it all up. Next the entire area got a good sanding and several coats of clear epoxy. Under the sole got extra attention with epoxy, it’s like hard toffee in there.
You can really see the structure of the lockers building strength
The lockers themselves will suffer from being dark caves of lost gear, so I chose to paint them heartily with white Aquacote to bring in the light. I am worried about the pounding they will take over time, so I intend to put rubber matting on their soles.
It was a rewarding part of the build because I felt less precious about the visual finish, and called “done” based on it’s feel. They now glow optimistically awaiting their hatching-in and dark future of servitude.
Cockpit Lockers ready for their topsStarboard lockersUnder the sole
As an aside, the situation with my damaged wrist four years ago has not improved. It’s not that it is horribly worse, but these past four years have meant no more than a few hours work can be done at a time before I have to stop, and a good days work on the boat can mean a week recovering. Finishing out these lockers really highlighted the problem. After standing back and admiring my work, I booked and appointment with the surgeon to get a fusion.
A mixed blessing fibreglass is. The unarguable protection it provides makes it a necessity, but dealing with it is not fun. The cloth is so slippery it slides out your hand like a wet fish, yet it jags on anything and distorts the weave requiring a stroking session to realign. Applying such large areas of it makes you stir crazy mixing the epoxy, and your wrist gets hammered squeegeeing it. That is all before we consider the health benefits!
The join of two sheets of fibreglass, still to be sanded
My process is to mark out as much as I can handle by myself, which is about two to three meters of 1500mm wide cloth, drape it on the boat and position it, then mark out the area to be covered. I have two objectives in mind, making best use of the cloth and keeping straight-ish edges.
If I had a few more people who could keep my odd and un-planned hours, I would attempt the entire side at once. But by myself, I am leaving gaps between the cloth panels and filling with epoxy mixed with light weight filler.
With the cloth off the boat and the area marked out, I then roll on a coat of epoxy to fill the area, then approach it gingerly with the cloth and drape carefully to my marks, paying attention to straight edges. Then it is into the squegeeing in more epoxy, pushing the cloth into the epoxy against the hull.
It takes two to six mixes of epoxy to fill the cloth sections and any extra goes towards rolling on the adjacent cured area, filling the weave.
Wet ‘glass on the bow
The result is a lean fit with no lifting of the cloth, but the weave will need more epoxy, and this can be achieved whilst it is still tacky, (but not too green), or later after a light sand.
Sanding fibreglass is my big hatred. I desperately dislike the glass fibres that it produces. To combat these nasty, itchy, glassy, sticky-inny shards, I invested in a decent sander that works well with my extractor, and I upgraded the extractor with a Dust Deputy thingo to improve the suck.
The Festo extractor with Dust Devil on top, ungainly but it sucks!
The Dust Deputy adds a cyclonic action to any extractor, or regular vacuum cleaner, much like Dyson has built into their celebrated vacuum cleaners. With my Festool extracter, I have done away with the bag, and just let the Deputy’s bin fill up. With the small amount of sanding I have done since installing the Deputy, I have filled the tub twice, indicating it is catching more than the bag did!
Kate gave me a Festool extractor four years ago, and it was the best thing she could have purchased me. Minimising dust is so critical with these modern materials, I don’t want anything to get in the way of enjoying this boat.
The Festool Rotex sander I purchased is amazing, it has two settings, a random orbit and a direct drive. So with the same 120 grit paper, I can remove material very quickly with the direct drive, and finish off with the random orbital setting. All with the twist of a setting on the head. To add to this, they are very quiet, almost not needing hearing protection.
The 90mm Festo Rotex sander
I chose the small Rotex (90mm) because I wanted it for detail sanding, but now I really want the big 125mm unit. Now I want both. But at $900 each this will not happen soon.
Off to the glass fibre work I go, I’m itching just thinking about it!
I am still messing with time-lapse photography, I had intended for the entire build to be recorded, but the failure of the DSLR I had employed has left me high and dry. Leaving a replacement $3k camera bolted to the rafters is something I could not afford and setting up a remote control-able camera time-lapse system was out of my desire range. So I will settle with recording interesting snippets when they occur to me.
The action of this Purbond is fascinating, you will note it foaming during the clamp up, also watch for the bit towards the end when I dive inside the hull and prop up a sagging plank.